The skater skirt has alway been that piece of clothing that I look at and think "I could do that" and guess what, I did. Just with two measurements and a little bit of trial and error I figured out how to make a fully functional skirt. Boom.
Take your two measurements and add an inch to each. These will be the new measurements you work with here on out. You'll need this for a half inch seam allowance while sewing things together.
 |
| Fold your fabric in half with the side you want to show touching. Sketch out a curve with half of your waist measurement. |
 |
| Take your length measurement and draw out another larger curve out so it looks like you've drawn out a rainbow. |
 |
| Pin down the fabric and cut along all the lovely lines we just made. |
 |
| With some of the excess fabric fold it over and pin it down. Measure out your waist measurement for the waist band. |
 |
| Make a line at an inch and a half and cut out the piece. |
 |
| These are the only pieces of fabric you are going to need so go ahead and put away and excess for some other project or something. |
 |
| While the pins are still there, go ahead and sew one side of the skirt together at half an inch. Go ahead and take out the rest of the pins as well. |
 |
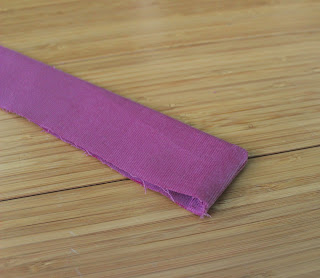
| On the waist band, fold back half an inch.. |
 |
| .. then fold that in half with the side you want showing in. Then go ahead and sew that down and stay as close to the edge as possible. Repeat this for the other side of the waist band. |
 |
| When you turn the waist band it should look like this. |
 |
| Place the elastic inside the waist band. |
 |
| Pin down the waist band onto the skirt along the edge of the side you want seen. Make sure to leave a half inch of space on each side of the skirt. |
 |
| Using the zipper foot, sew as close to the elastic as possible. |
 |
| Fold up half an inch along the entire bottom of the skirt and sew down for a finished edge. |
That's it. A finished, fully functional, skirt. Now go wear it and feel super cute and proud because you are the only person who will ever own that particular skirt.

Julia Carrington


0 comments